The Art of Fish Portrait Photography
By IGFA Lifetime Member Tom Olivo and Founder of Fly Fishing Portraits (www.flyfishingportraits.com)
")
One of the challenges we’ve all experienced while fishing is capturing a beautiful photo of a special fish we plan on releasing. I’ve spent the past ten years fine tuning my photography skills while fishing and have created a process that works well for me and may help you memorialize an unforgettable fishing experience or possibly document a potential IGFA World Record. After all, if you have a great photo of your catch of a lifetime, you’ve got evidence. If there is no photo, all you have is a fish story!
When I plan my fishing outing, I use the following outline to prepare me for capturing an incredible photo. Here are the “Top 10” most important variables you will need to manage to photograph that fish of a lifetime.
1. The camera
I began taking self-portraits with a very compact, high-quality point-and-shoot camera that was easy to manage and hold and focus with one hand. I recommend a camera that has high megapixel performance (12 megapixels or higher) with easy auto aperture and focus capabilities. After doing this for one year, I graduated to a professional Digital Single Reflex Lens (DSLR) or mirrorless camera with a versatile 28-300 millimeter lens that gives me incredible range to shoot a variety of shots from scenic panoramas to close up portraits.
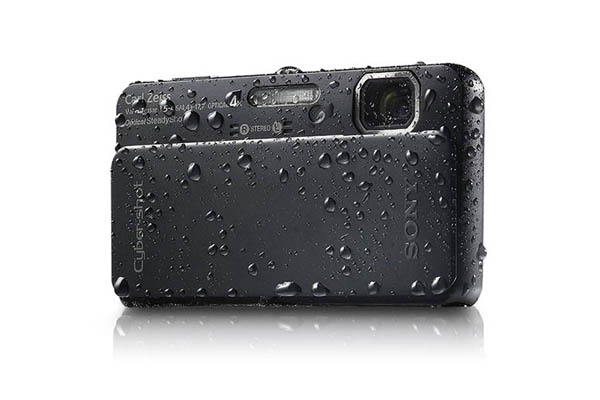
A high-quality point-and-shoot camera that is waterproof and shockproof provides a good start to taking fish portraits.
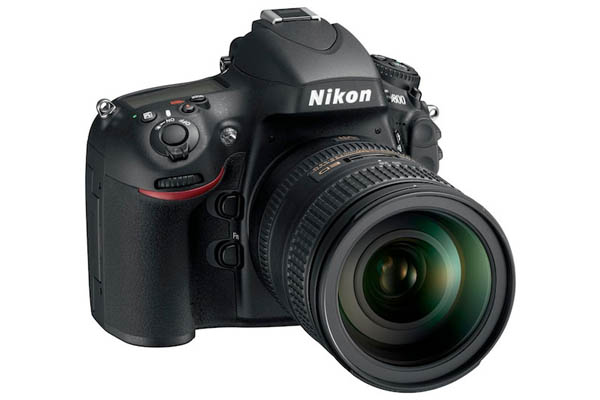
A professional Digital Single Reflex Lens (DSLR) or mirrorless camera with a versatile 28-300 millimeter lens can provide more creative freedom with taking fish portraits.
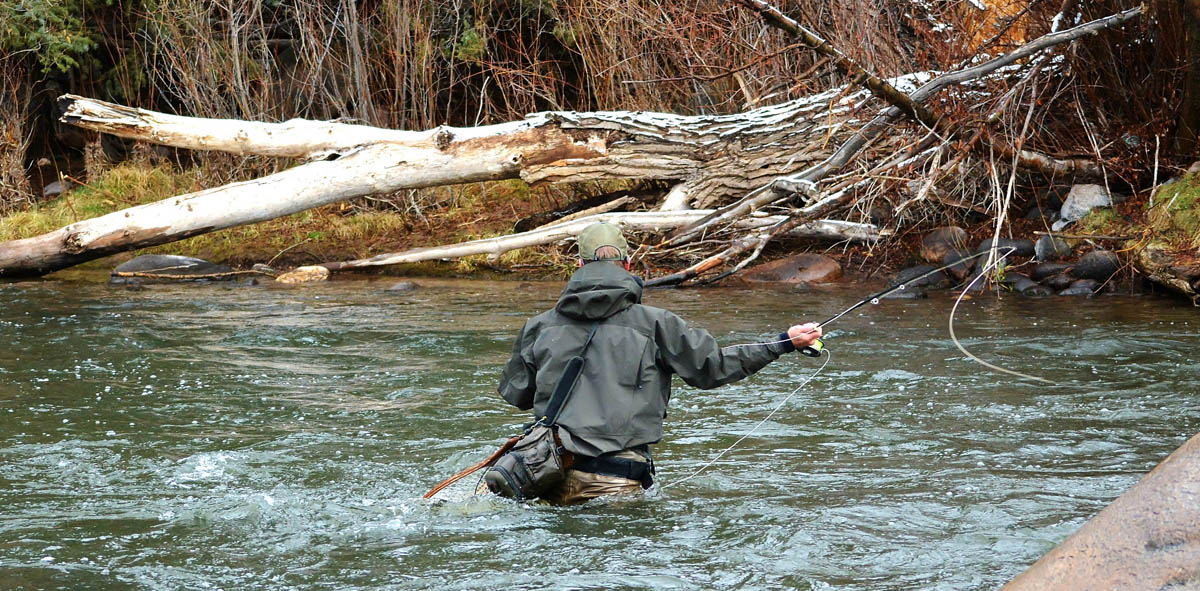
2. Location
In this case, let’s assume you are fishing in a river or stream. When I arrive at a location, I take inventory of my surroundings and assess where I’m fishing, where I’m going to fight and land a fish and the most aesthetic location nearby to capture that special moment.
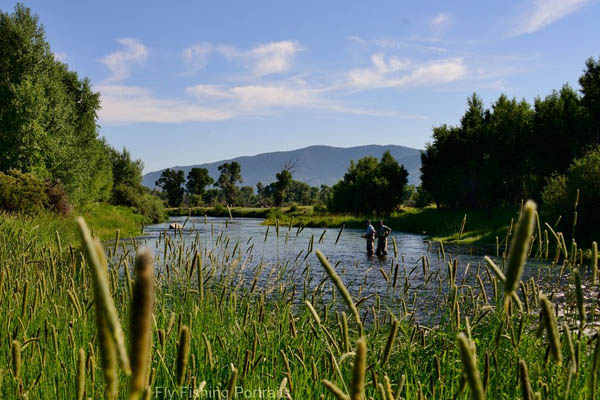
Take note of your surroundings and isolate the most aesthetic location for your photo shoot.
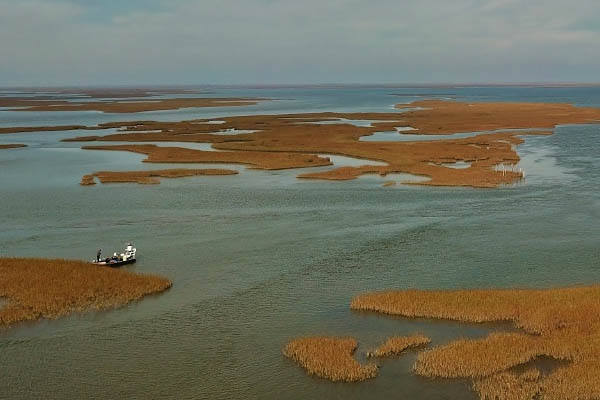
Bring the skiff or boat close to an area that will help show contrast or good depth-of-field in your images.
3. The fish
The fish is the most important variable because you will need to take care of the fish so that it can be released quickly and unharmed. Depending upon how long it took to land the fish, the fish’s condition may restrict the time available to photograph the fish and be able to release it healthy. In my opinion, there really is no need to remove the fish from the water and I prefer using the #keepemwet mentality. Most of the time with trout fishing in streams I will use the most aesthetic landing net I can buy to safely manage the fish, get prepared for my photos and have it also serve as a background prop.
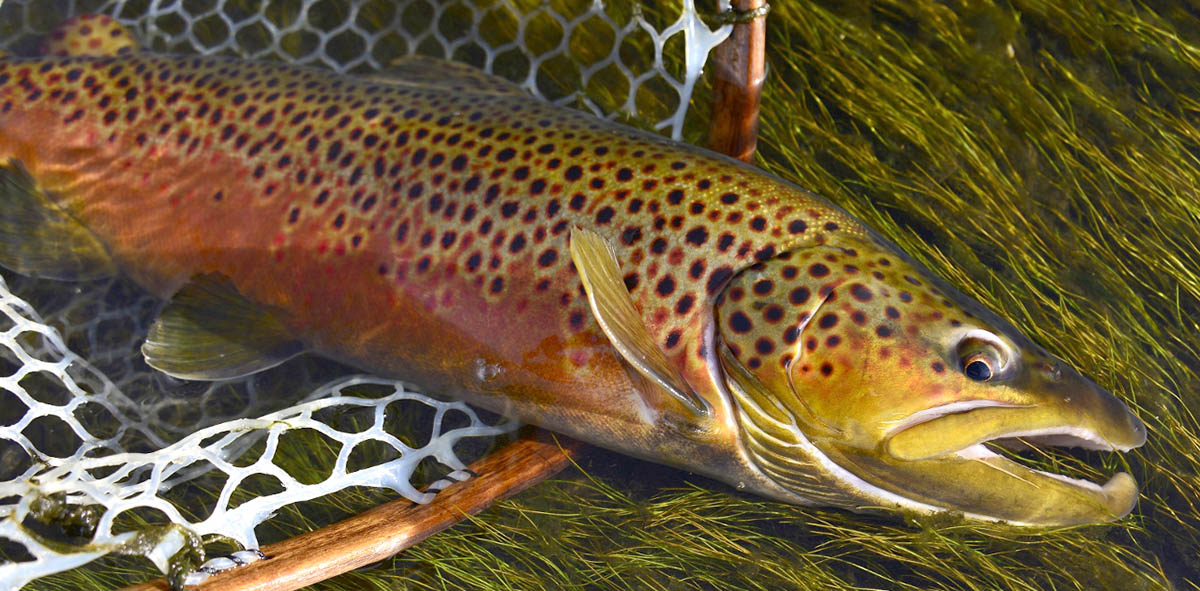
Use the natural backdrop of water vegetation or a beautiful landing net to enhance the aesthetics of your photo.
4. Weather
With a point and shoot camera, it can easily fit in your jacket or fly-vest pocket and protect it from harmful elements. Many people also opt for a waterproof housing to reduce the potential for damage if it is accidently dropped in the water. My SLR camera is rather large and heavy. Although I will sometimes have it hung around my neck inside of my GORE-TEX rain shell, I will more often keep it close at hand in a waterproof bag or case.
A waterproof camera bag or placing the camera inside the GORE-TEX jacket I'm wearing can helps protect the camera from the elements.
5. Light and camera angle
Even though you may not have ideal low-angle light, you should be able to get more desirable lighting by adjusting the orientation of the fish and incorporating other background elements. I prefer early morning or late afternoon light that I can use to accentuate the brilliant colors and scale textures of the fish, as well as create shadow effects with the fins. In many cases, under adverse weather conditions, I will use my built-in flash to fill in the dark areas of the fish. I also prefer to use a polarized filter to cut through glare on the water’s surface, accent the river bottom and minimize the reflection of the flash reflecting from the fish’s body.

You should be able to create better, more desirable, lighting with your orientation of the fish and incorporation of other background elements.
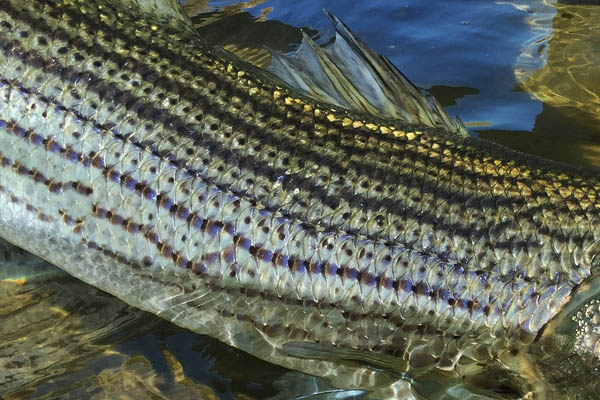
I also prefer to use a polarized filter to be able to cut through glare on the water surface and minimize the reflection of the flash off silvery fish like this striped bass.
6. Background
Depending upon your situation and water clarity, it is often possible to have a great background with river bottom features such as rocks, gravel, logs, and vegetation. For my signature shot, I like to have a thin layer of water cover the fish to accent the look of the fish and to have something unique in the background provide a sense of scale, contrast or compliment in color and texture.
I like to have a thin layer of water cover the fish.
Depending upon your situation and water clarity, it is often possible to have a great background with river bottom features such as rocks, gravel, logs, and vegetation.
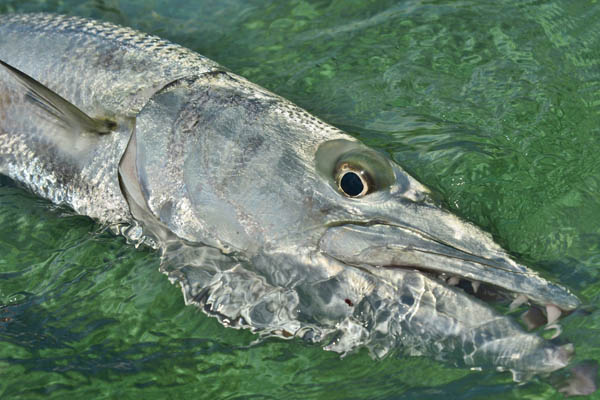
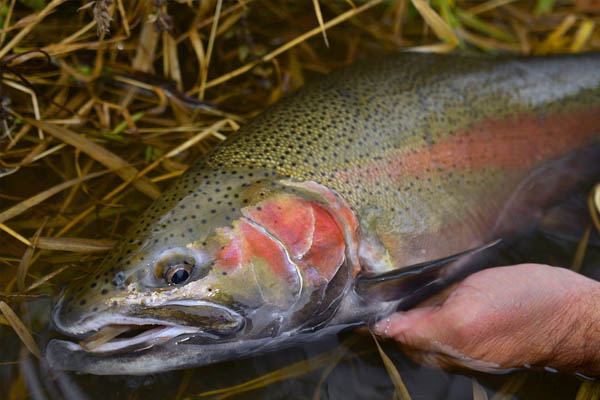
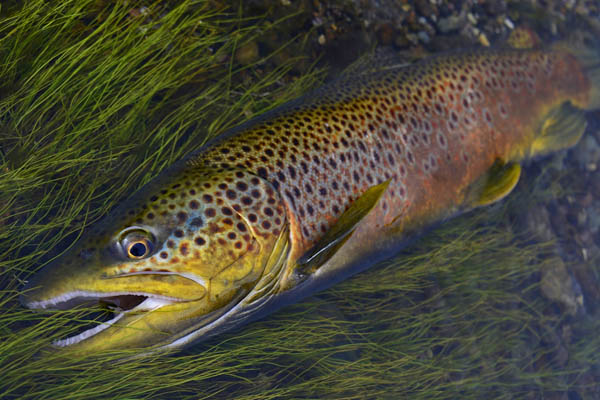
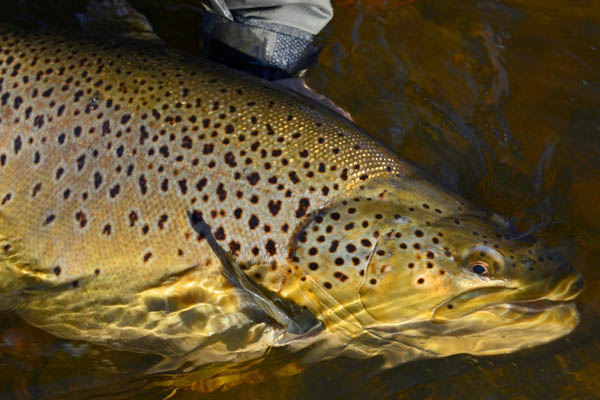
7. Orientation and scale
My preference is an exaggerated landscape orientation that emphasizes any one of four body areas of the fish. These include the head, gill plate, the body scales, fins and tail section. With each species and individual fish there is often a unique body element that can really make your photo. For trout, steelhead, and peacock bass it’s the intense colors of the gill plate or side of the body. For redfish, it’s the massive head, large golden scales and unique spot on the tail. For toothy predators like northern pike, barracuda and golden dorado, it is the powerful jaws and teeth.
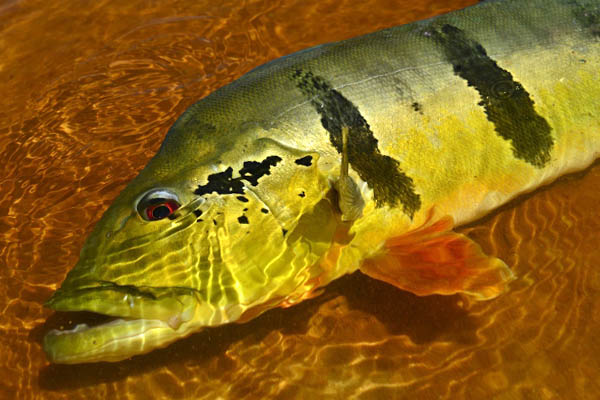
For trout and peacock bass I frame the intense colors of the gill plate or side of the body.
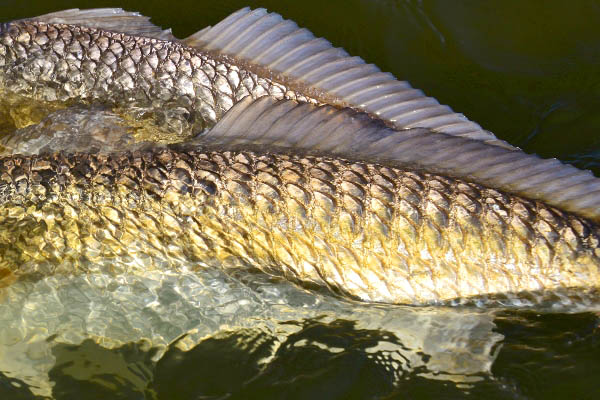
For redfish, it’s the massive head, large golden scales and unique spot on the tail.
8. Focal point and depth of field
I really like to focus on the fish’s eye and allow the depth of field to grade out along the body of the fish. It creates a great effect where the fish appears to come to life in the the photo as if it is looking right at you.
I really like to focus on the fish’s eye and allow the depth of field to grade out along the body of the fish.

When I focus on the fish's eye it helps the fish seem to come to life in the the photo as if it is looking right at you.
9. Exposure
I tend to slightly under-expose all my photos because the fish’s scales often reflect the light back into the lens and because it’s also easier to adjust the lighting in post-production. If you take a photo that’s over-exposed, it’s really difficult to do much to improve it in post-production.
Underexposing your shot allows you to retain the color and depth in post-editing the photo.

With reflective, silver fish like bonefish and tarpon underexposing the shot lessens "blown-out" shots where the scales become bleached by excessive light.
10. Use caution but take risks
If you don’t take some calculated risks you will not be able to get exceptional shots, but you still need to exercise caution. I have fallen in the river once while wading with my expensive SLR and lens and have been ejected out of a boat in Alaska, each time with my camera inside my GORE-TEX shell. In both cases, I wasn’t personally injured but my camera was toast until I could get it serviced by the camera company.

Take calculated risks to photograph close to the fish and waterline.

A splashing mahseer might wet your camera but well worth it to capture their gorgeous scales in a photo.
About Tom Olivo
IGFA Lifetime Member, Tom Olivo, began fishing in Southern NY at age 4, was fly fishing by age 12, and now spends no less than 60 days a year on the water with multiple cameras to capture unique close-up portraits of game fish. He began his photography hobby in 1975 while in college shooting and filming competitive gymnastics and diving events. During his NCAA coaching career, he went on to establish and develop the largest video tape library of competitive diving events in the world. His videos served as principal training aids and were ultimately used by every major competitive program throughout the US.
According to Tom, “The challenge of shooting competitive athletes, moving extremely fast in poor lighting conditions helped me learn the fundamental skills to better manage the challenging variables often encountered while fishing.”
Tom’s web site www.flyfishingportraits.com features close up photos that are what he calls “self-portraits” of unique game fish. To join Olivo as an IGFA Lifetime Member please visit here.